mirror of
https://github.com/wiiu-env/WiiUPluginSystem.git
synced 2025-07-26 21:37:35 +02:00
101 lines
5.4 KiB
Markdown
101 lines
5.4 KiB
Markdown
---
|
|
title: Setting up an IDE
|
|
tags: [ide]
|
|
keywords: ide, codeblocks, clion
|
|
last_updated: December 30, 2018
|
|
sidebar: dev_sidebar
|
|
permalink: dev_ide_setup.html
|
|
folder: dev
|
|
topnav: topnav
|
|
---
|
|
|
|
## Code::Blocks
|
|
This section is about setting up `Code::Blocks` for developing Wii U Homebrew using the `devkitPPC` toolchain.
|
|
|
|
### Preparations
|
|
If you didn't set up `devkitPPC` already, you may want to follow [this](dev_toolchain_setup) tutorial. You should've installed the required libraries for plugin development by now as well. If not, check out [this](dev_required_libraries) page.
|
|
|
|
### Installation
|
|
`Code::Blocks` is a free IDE and can be downloaded [here](http://www.codeblocks.org/). Install it according to the `Code::Blocks` homepage.
|
|
|
|
### Setting up the compiler
|
|
For Wii U homebrew we generally use custom makefiles but `Code::Blocks` still needs to have a valid compiler/toolchain set. Using this tutorial we are overriding an existing compiler setting.
|
|
If you are using it for non Wii U projects, make sure to make a backup/copy of the settings.
|
|
Once you have opened Code::Blocks, you can access the compiler options menu via `Settings -> Compiler...` on the menu bar.
|
|
1. Select the `GNU GCC Compiler for PowerPC (HighTec)` in the dropdown menu.
|
|
2. Press `Set as default`
|
|
3. Click on the `Toolchain executables` tab.
|
|
4. Set `Compiler's installation directory` to the bin folder of your `devkitPPC` installation (on Windows this usually is `C:\devkitPro\devkitPPC\bin`)
|
|
5. Set `C compiler` to `powerpc-eabi-gcc` (on Windows `powerpc-eabi-gcc.exe`)
|
|
6. Set `C++ compiler` to `powerpc-eabi-g++` (on Windows `powerpc-eabi-g++.exe`)
|
|
7. Set `Linker for dynamic libs:` to `powerpc-eabi-g++` (on Windows `powerpc-eabi-g++.exe`)
|
|
8. Set `Linker for static libs:` to `powerpc-eabi-ar` (on Windows `powerpc-eabi-ar.exe`)
|
|
9. Set `Make program` to `make` (on Windows `make.exe`)
|
|
10. Save the settings by clicking on `OK`
|
|
|
|
An example configuration can be found here:
|
|

|
|
|
|
### Next steps
|
|
Now you can turn any existing project into a `Code::Blocks` project by following [this](dev_codeblocks_project_from_scratch.html) tutorial.
|
|
|
|
Alternatively, you can use the `Code::Blocks` template to create a new plugin project from the scratch. A tutorial for this can be found [here](dev_project_template_in_code_blocks.html).
|
|
|
|
{% include links.html %}
|
|
|
|
## CLion
|
|
`CLion` is a smart cross-platform `IDE` for `C` and `C++` development.
|
|
|
|
### Preparations
|
|
See the `Code::Blocks` preparations above.
|
|
|
|
### Installation
|
|
You can download `CLion` [here](https://www.jetbrains.com/clion/download).
|
|
|
|
### Setting up the compiler
|
|
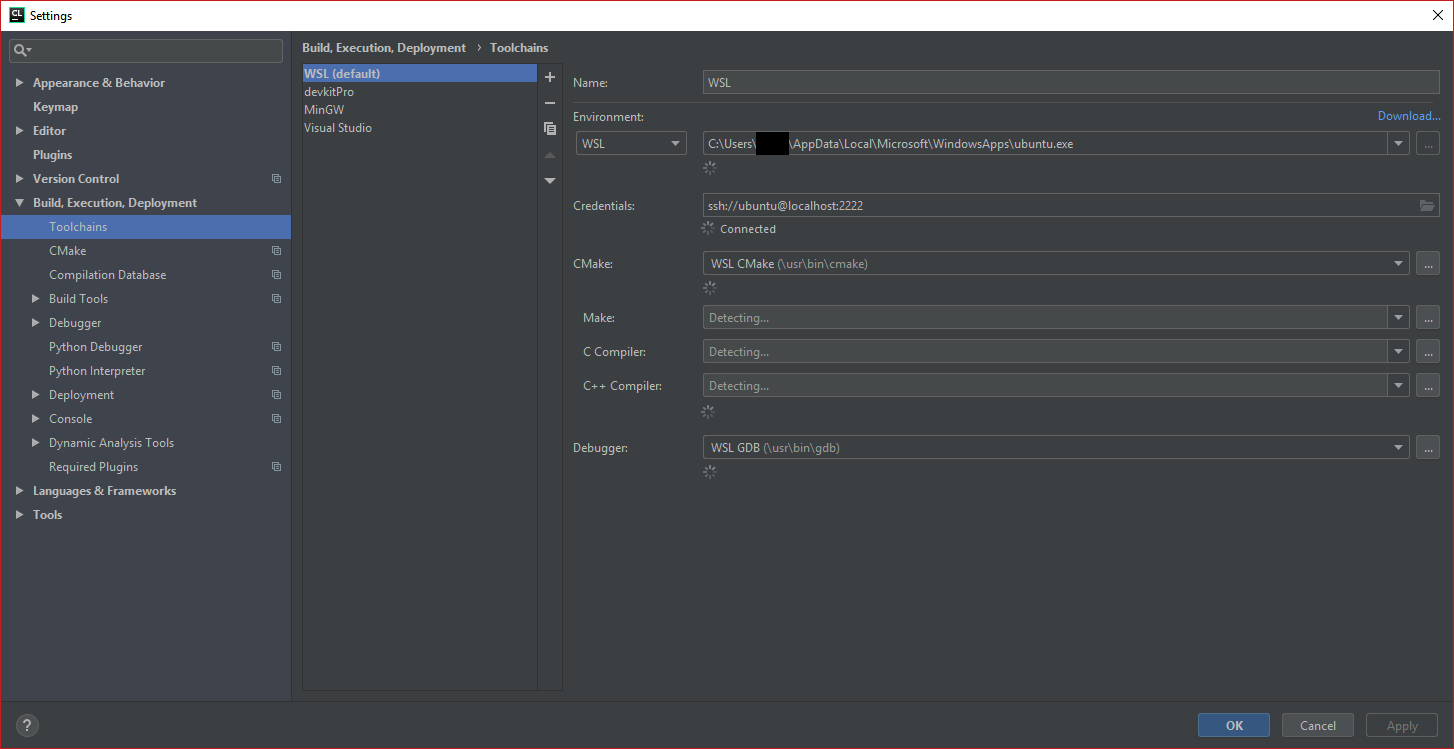
In `CLion` you should setup a supported `gcc` like `C/C++` compiler toolchain (not `devkitPro`!). For `Linux` this should be pre-installed. If not, you may want to follow [this](https://linuxconfig.org/how-to-install-gcc-the-c-compiler-on-ubuntu-18-04-bionic-beaver-linux) guide. On `Windows` you need to install something like [`WSL`](https://blog.jetbrains.com/clion/2018/01/clion-and-linux-toolchain-on-windows-are-now-friends/) (recommended) or [`MinGW`](https://sourceforge.net/projects/mingw/files/latest/download)/[`Cygwin`](https://cygwin.com/install.html). Depending on which toolchain you chose, you need to configure it as the default toolchain in `CLion` under `File` -> `Settings` -> `Build, Execution, Deployment` -> `Toolchains`:
|
|
|
|
Please note that this toolchain is only needed to provide code inspections on library functions. We're of course still using `devkitPro` for compiling the plugin.
|
|
|
|
### Beginning a project
|
|
You can now use the `Code::Blocks` template to open in `CLion` by going to `File` -> `Open...` and choosing the project's root directory. Delete the `windows_template.cbp` file since it's not needed.
|
|
|
|
### Getting library code inspections
|
|
If you also want to get code inspections on `wut` or `wups` functions (highly recommended), you need to create a respective `CMakeLists.txt` to use `CLion`'s features to their fullest possible potential:
|
|
```
|
|
# We only use this CMakeLists.txt for CLion IDE support, not for building
|
|
|
|
# Set the minimum required CMake version
|
|
cmake_minimum_required(VERSION 3.10)
|
|
|
|
# Set the project name
|
|
set(PROJECT_NAME "example_project")
|
|
project(${PROJECT_NAME})
|
|
|
|
# Set the C++ standard
|
|
set(CMAKE_CXX_STANDARD 17)
|
|
|
|
# Add extra include directories
|
|
if (WIN32) # When using a Windows compilation toolchain
|
|
set(WUT "/c/devkitPro/wut/include")
|
|
set(WUPS "/c/devkitPro/wups/include")
|
|
else () # When using WSL as toolchain
|
|
set(WUT "/mnt/c/devkitPro/wut/include")
|
|
set(WUPS "/mnt/c/devkitPro/wups/include")
|
|
endif ()
|
|
|
|
include_directories(${WUT})
|
|
include_directories(${WUPS})
|
|
|
|
add_executable(${PROJECT_NAME} src/main.cpp)
|
|
```
|
|
|
|
Please note that you may need to adapt the `WUT` and `WUPS` variable file paths if they are different than the ones specified above.
|
|
|
|
### Compiling
|
|
Compiling is still done using the command line/terminal and running the `make` command. `CLion` has a built-in Terminal feature for this. Click on `View` -> `Tool Windows` -> `Terminal` to open a `Terminal` inside `CLion`:
|
|

|
|
|
|
### Video tutorial
|
|
If you need some visual aid, I even created a video showing the whole plugin template and compilation setup [here](https://www.youtube.com/watch?v=Q4_kEyiCU8A).
|