mirror of
https://github.com/ClusterM/fdskey.git
synced 2025-12-18 01:16:09 +01:00
171 lines
10 KiB
Markdown
171 lines
10 KiB
Markdown
# FDSKey
|
||
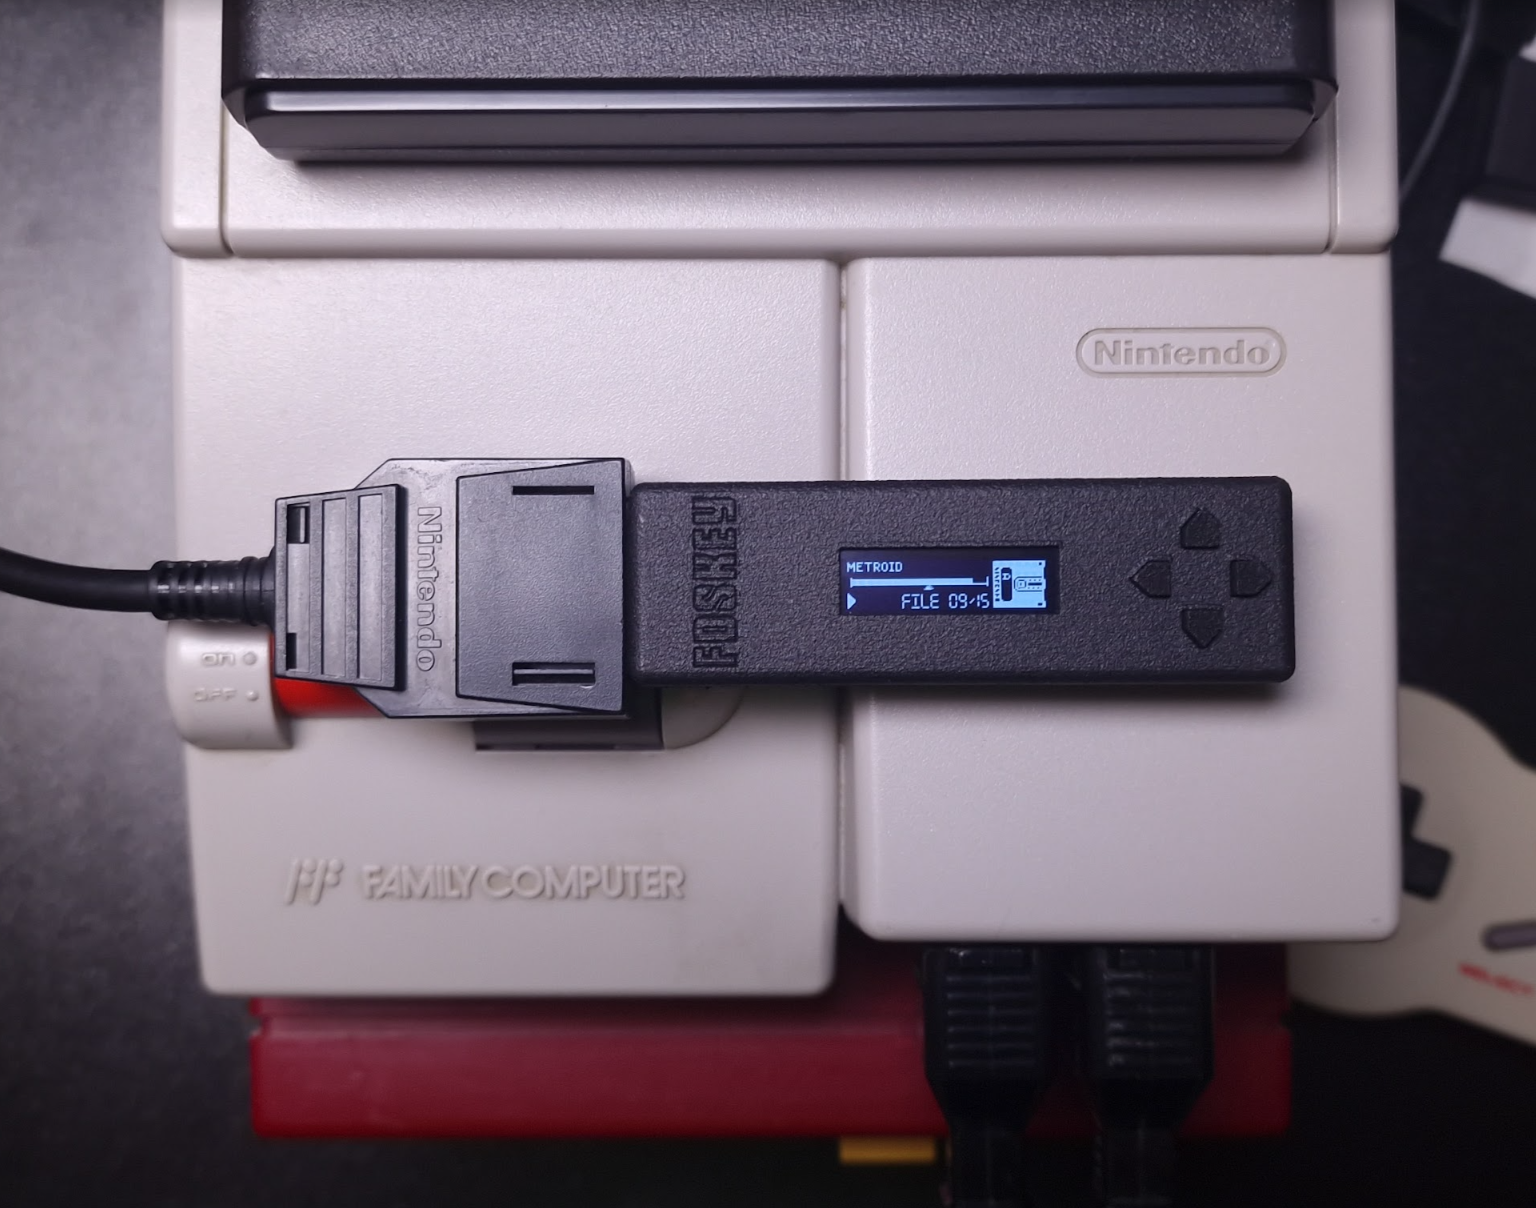
An open-source, low-cost, and easy-to-build Famicom Disk System drive emulator featuring a sleek OLED display.
|
||
|
||
This project is currently a work in progress and is not yet finished.
|
||
|
||
|
||
|
||
|
||
|
||
How you can use it:
|
||
* You can run Famicom Disk System disk images from a microSD card
|
||
* You can dump disks using a physical FDS drive without additional hardware/cables
|
||
* You can write disks using a physical FDS drive without additional hardware/cables
|
||
|
||
Requirements:
|
||
* Famicom
|
||
* Famicom Disk System RAM adaptor
|
||
* microSD card
|
||
|
||
## How to build it
|
||
You'll need a few low-cost components.
|
||
|
||
### Circuit diagram
|
||

|
||
|
||
### Bill of materials
|
||

|
||
|
||
### Components
|
||
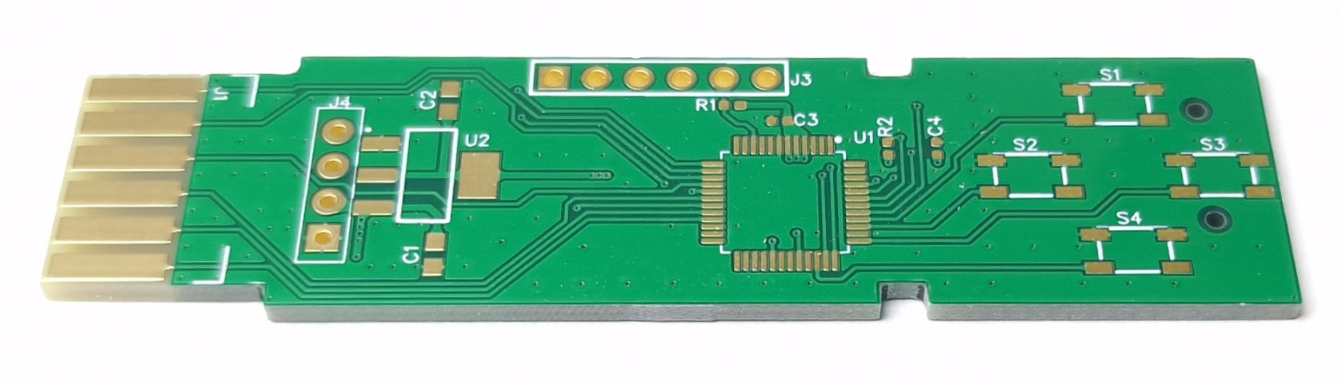
1. **PCB**
|
||
|
||
|
||
|
||
The PCB is designed in the [DipTrace](https://diptrace.com/) software.
|
||
|
||
You can have it produced at any PCB factory (e.g. [jlcpcb.com](https://jlcpcb.com) or [PCBWay](https://pcbway.com/)) using [gerber files](PCB_gerbers). PCB properties:
|
||
* PCB thickness: 1.6mm
|
||
* Gold fingers are recommended
|
||
|
||
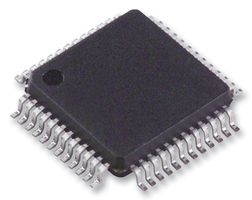
2. **STM32G0B0CET (or any STM32G0B0CETxxx) microcontroller**
|
||
|
||
|
||
|
||
You can easily find it on [mouser.com](https://www.mouser.com/c/?q=STM32G0B0CET) or [taobao.com](https://s.taobao.com/search?q=STM32G0B0CET).
|
||
|
||
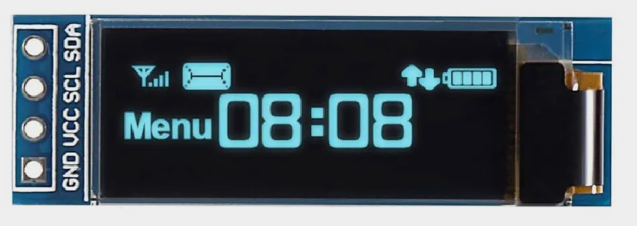
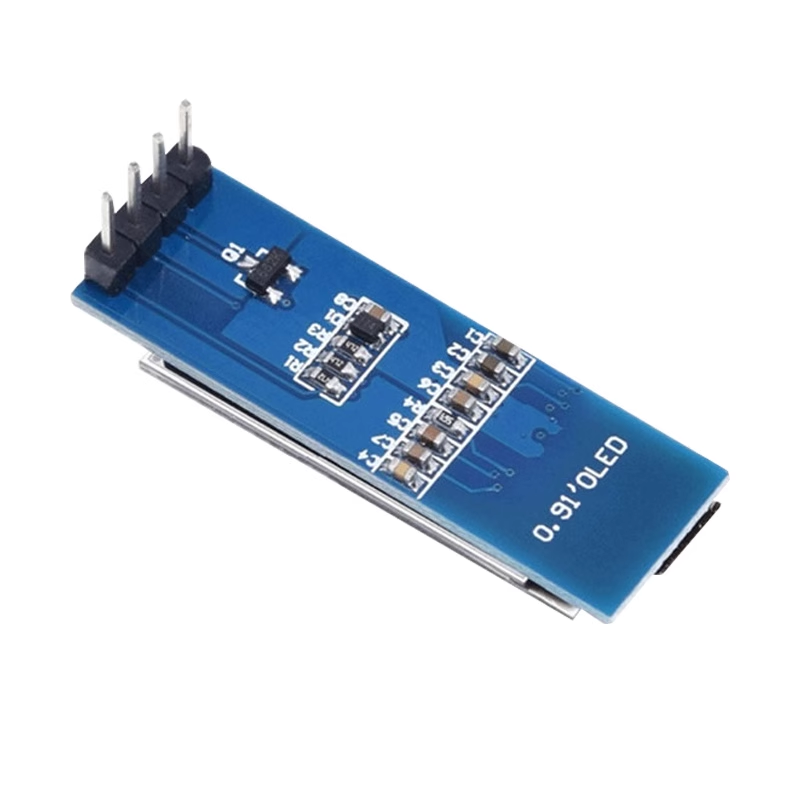
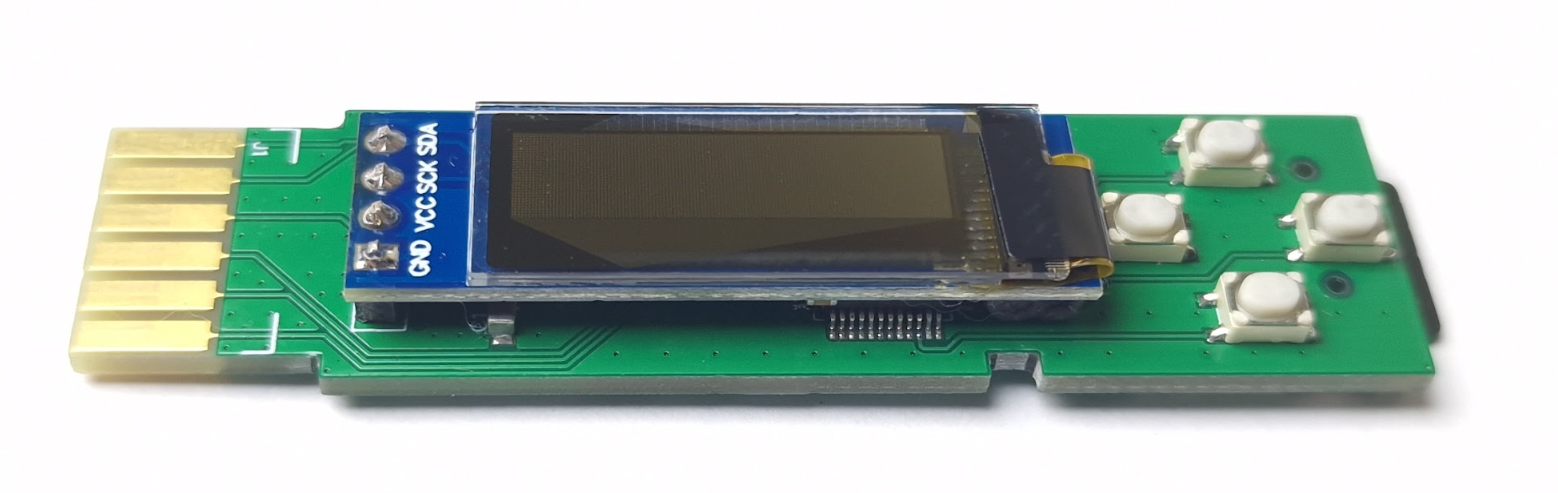
3. **OLED display module**
|
||
|
||
|
||
|
||
|
||
|
||
It's a very popular OLED display, search for **SSD1306 0.91-inch OLED 128x32 4-pin** on [aliexpress.com](https://aliexpress.com), [ebay.com](https://ebay.com), [amazon.com](https://amazon.com) or [taobao.com](https://taobao.com). These displays are available in different colors: blue, white and yellow, you can select the one you prefer.
|
||
|
||
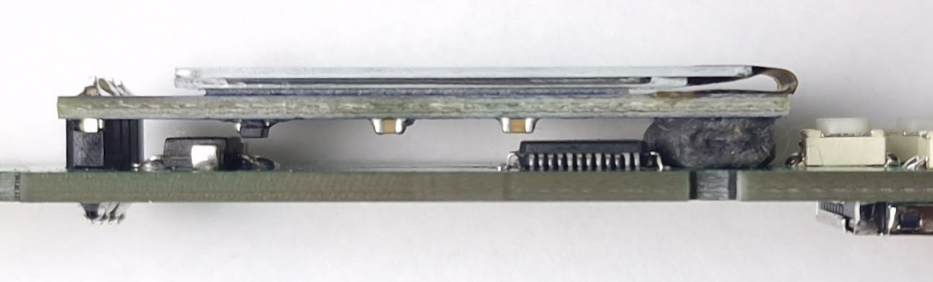
Solder it like this:
|
||
|
||
|
||
|
||
It's recommended to put something soft under the display on the right side.
|
||
|
||
**WARNING**: some unscrupulous sellers may sell you used, burned-in displays.
|
||
|
||
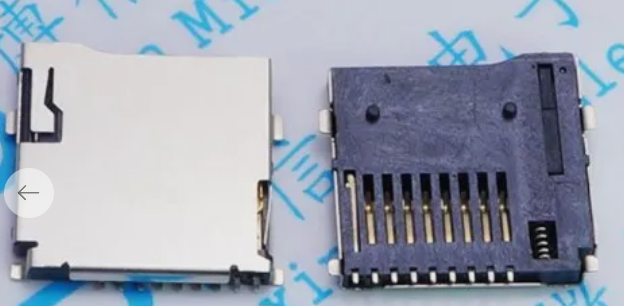
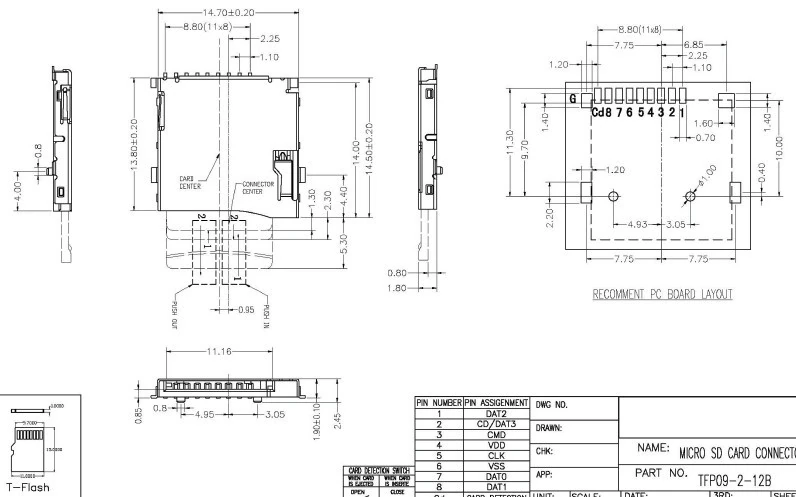
4. **microSD card socket (push-push, 8-pin + card detect pin = 9-pin)**
|
||
|
||
|
||
|
||
|
||
|
||
It's a very popular push-push socket, they can be found on [aliexpress.com](https://aliexpdress.com). Also, you can search for **112J-TDAR-R01** model but there are many compatible models with other names. You can always modify the PCB to accommodate a different socket model.
|
||
|
||
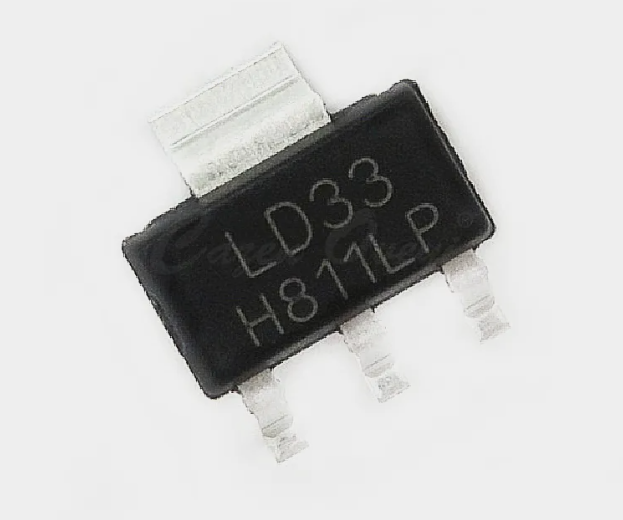
5. **LD1117S33 stabilizer**
|
||
|
||
|
||
|
||
You can buy it in any electronic components store.
|
||
|
||
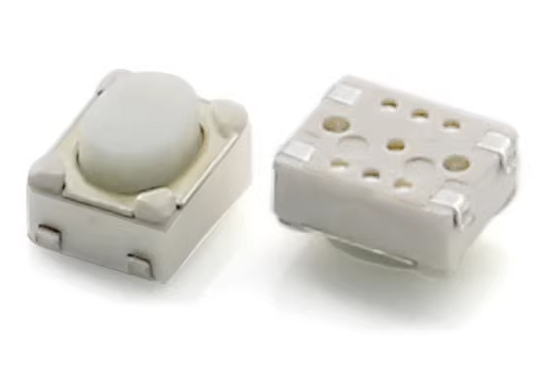
6. **Four SMD buttons**
|
||
|
||
|
||
|
||
Search for **3X4X2.5H SMD** buttons, they can be found on [aliexpress.com](https://aliexpress.com), [ebay.com](https://ebay.com), [amazon.com](https://amazon.com) or [taobao.com](https://taobao.com). You can also search for **434133025816** model on [mouser.com](https://www.mouser.com/c/?q=STM32G0B0CET).
|
||
|
||
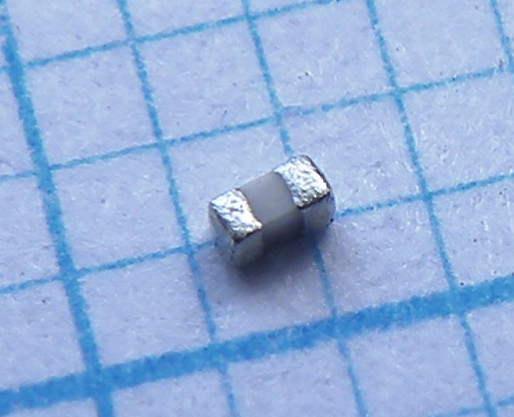
7. **Resistors and capacitors**
|
||
|
||
|
||
|
||
You will need only a few of them:
|
||
* C1, C2 - two 22uF ceramic capacitors, 0603 size
|
||
* C3, C4 - two 100nF ceramic capacitors, 0402 size (0603 will be fine too)
|
||
* R1, R2 - two 1.5K resistors, 0402 size (0603 will be fine too), actually you can also use any values from 1K to 10K
|
||
|
||
You can buy them in any electronic components store.
|
||
|
||
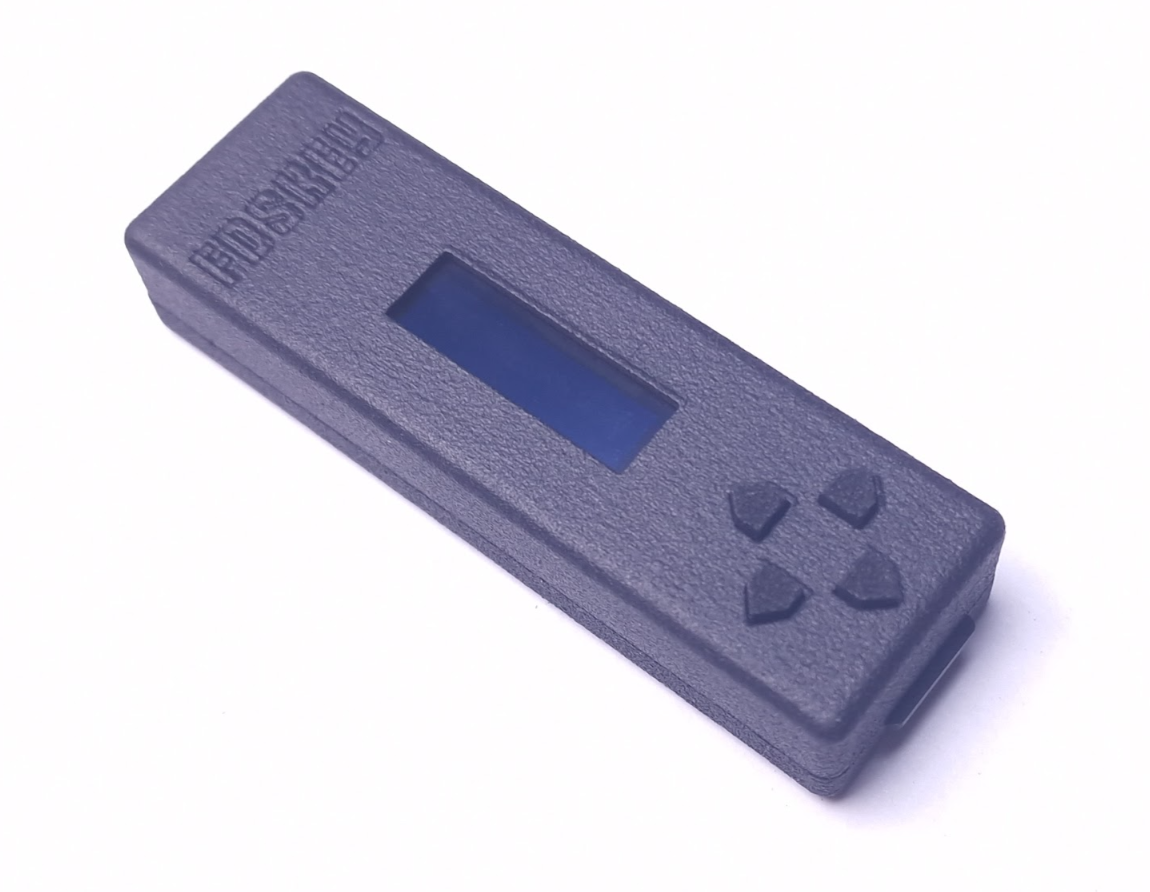
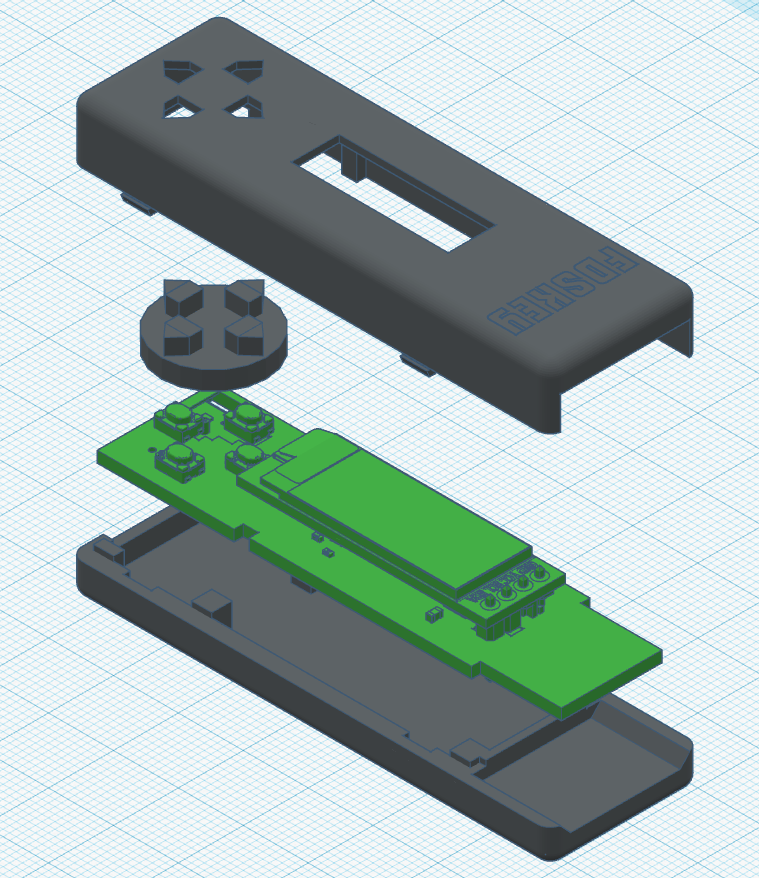
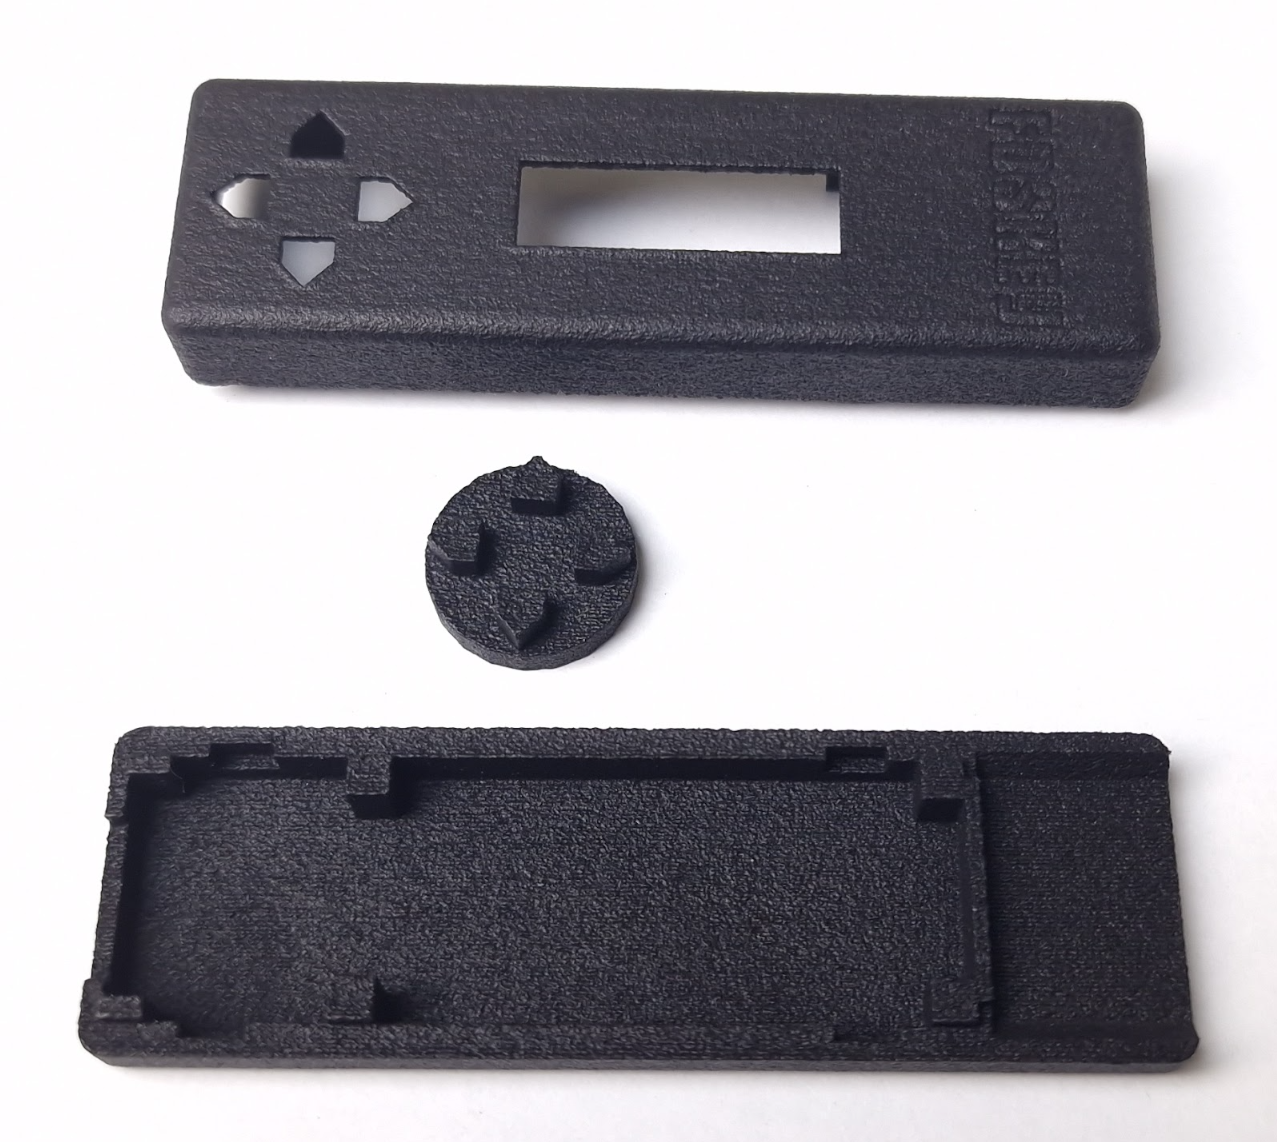
8. **Plastic case**
|
||
|
||
|
||
|
||
You can print plastic case with a 3D printer. You can find .stl files in the [case_3d_models](case_3d_models) directory. There are two types of models:
|
||
* [For FDM 3D printers](case_3d_models/fdm) - can be printed on a affordable home 3D printer, the bottom and top parts of the case must be glued together
|
||
* [For MJF 3D printers](case_3d_models/mjf) (recommended) - for industrial 3D printing, you can order it from a manufacturing service (e.g. [jlcpcb.com](https://jlcpcb.com)), this version features latches
|
||
|
||
|
||
|
||
What does it look like when everything is assembled:
|
||
|
||
|
||
|
||
## Flashing the firmware
|
||
There are five TH pads (actually 6 but 1 is unused) on the PCB to connect a ST-Link programmer (GND, VCC, SWD, SWCLK and NRST). First, you need to write the bootloader - **bootloader.bin** file. Then you can put the main firmware file - **fdskey.bin** on your SD card (FAT/FAT32/exFAT formatted) and hold all four buttons on power-on, e.g. connect FDSKey to RAM adaptor, hold buttons and turn a Famicom on. You can use the same method to update the main firmware in the future without additional hardware.
|
||
|
||
After the first boot, press and hold the **left** button for 3 seconds to access the service menu. There, you can select the OLED display controller type (change it if the display shows a corrupted image) and check some system information.
|
||
|
||
## Device usage
|
||
Format a microSD card to FAT/FAT32/exFAT and put some .fds files on it. Insert a microSD card into a FDSKey, insert a FDSKey into a RAM Adaptor's cable instead of a physical disk drive and turn on a Famicom. You can hot plug a FDSKey when Famicom is already on too, it's ok.
|
||
|
||
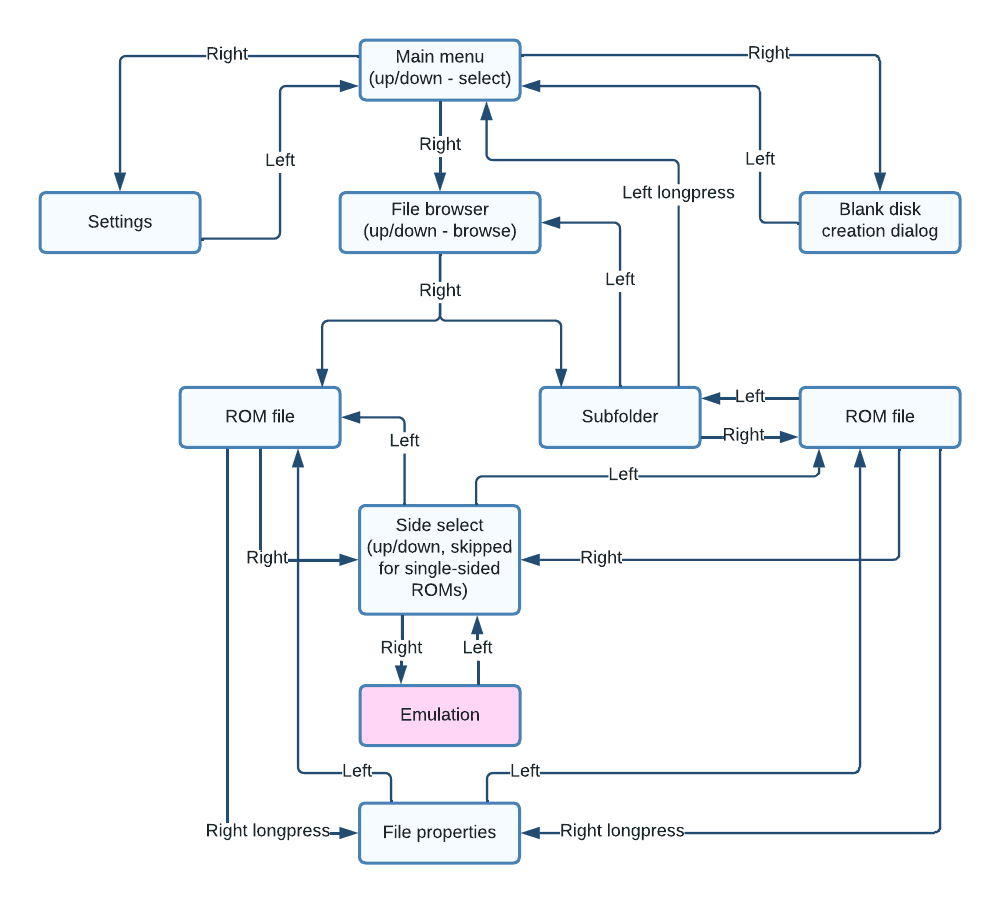
Now you can navigate through the FDSKey interface using the buttons. **Left** button usually means **back**, **right** button usually means **OK** and **up**/**down** are used to select something (file, disk side, etc.) Also, you can long press the **left** button in the file browser to directly return to the main menu from a subfolder, and long press the **right** button to open the file properties menu.
|
||
|
||
|
||
|
||
Oops, too complicated :( Let's try again...
|
||
|
||

|
||
|
||
Much better.
|
||
|
||
**WARNING**: when a game writes some data to a virtual disk (i.e., saves game progress) don't turn off your Famicom power until the updated ROM has been saved to the SD card. Wait a second for it or eject a virtual disk (**left** button). A **saving** message will be displayed, do not turn off power while this message is visible.
|
||
|
||
### Settings menu
|
||
Use **up**/**down** buttons to select a setting and **left**/**right** to change it. Setting descriptions:
|
||
* Rewind speed: you can select a drive operation speed as either **original** (very slow, like on a physical FDS drive, for the nostalgic ones), **fast** (where the rewind time is reduced but the virtual head position is not altered), or **turbo** (the fastest possible mode, instant head rewind)
|
||
* Remember state: you can select a power-on state between **none** (always start from the main menu), **browser** (open browser and select last file if browser was opened before power off) and **ROM** (start first side of the last started game emulation if ROM emulation was active before power off)
|
||
* Hide non .fds files: hide files with non .fds extension in the file browser
|
||
* Hide .fds extensions: hide .fds extension in the file browser
|
||
* Hide hidden files: hide hidden files and directories in the file browser
|
||
* Brightness: screen brightness from 0 to 10
|
||
* Invert screen: draw black on white instead of white on black
|
||
* Lefty mode: rotate screen image on 180 degrees and flip buttons
|
||
* Screen off after: time before automatic screen off if there is no any action (button presses, drive activity), it's recommended to use this feature to prevent OLED screen burn-in
|
||
* Backup original ROM: copy a .fds file to a .fds.bak file if a disk content was rewritten
|
||
* [ Save and return ] - press **left** or **right** button on this item to return to the main menu
|
||
|
||
### How to dump physical disks
|
||
You can use a homebrew disk copier applications to copy a physical disk to a virtual one, simply create an empty ROM. There is **Create blank disk** item in the main menu for it.
|
||
1. Put **Disk Hacker**/**Disk Keeper** or another homebrew disk copier ROM on SD card
|
||
2. Select a disk copier software on your SD card like any other ROM and load it
|
||
3. Return to the main menu and select **Create blank disk**
|
||
4. Enter filename for the new ROM, trailing spaces will be trimmed
|
||
5. When disk copier asks to insert game disk disconnect a FDSKey from a RAM adaptor and connect a physical FDS drive with a game disk inserted
|
||
6. When disk copier asks to insert new/blank disk disconnect a physical drive, connect a FDSKey and select ROM created in steps 3-4
|
||
7. Repeat steps 5-6 until the copy operation is completed
|
||
|
||
### How to write physical disks
|
||
This is a reverse operation of dumping: you can use disk copiers homebrew applications to copy a virtual disk to a physical one.
|
||
1. Put **Disk Hacker**/**Disk Keeper** or another homebrew disk copier ROM on SD card
|
||
2. Select a disk copier software on your SD card like any other ROM and load it
|
||
3. When disk copier asks to insert game disk select the source ROM/side
|
||
4. When disk copier asks to insert new/blank disk disconnect a FDSKey from a RAM adaptor and connect a physical FDS drive with blank disk inserted
|
||
5. Disconnect a physical FDS drive and connect FDSKey
|
||
6. Repeat steps 3, 4, and 5 until the copy operation is completed
|
||
|
||
## Firmware updates
|
||
You can always download the latest version at https://github.com/ClusterM/fdskey/releases.
|
||
|
||
Also, you can download automatic interim builds at http://clusterm.github.io/fdskey/.
|
||
|
||
Remember, you can update the firmware by putting **fdskey.bin** on your SD card and holding all four buttons on power-on.
|
||
|
||
## Donate
|
||
* PayPal: cluster@cluster.wtf
|
||
* [Donation Alerts](https://www.donationalerts.com/r/clustermeerkat)
|
||
* [Boosty](https://boosty.to/cluster)
|