Using the Firmware Updater
Go to the website for the Firmware Updater and follow the prompts. You must be running a Chromium-based browser (Chrome, Edge, etc) on a desktop (or laptop) to use the Firmware Updater -- it does not work on mobile browsers or Firefox.
Before updating ensure all cartridges are removed from the OSCR. If you don't see your OSCR in the list you must install the driver first. There's a link to the driver installer on the updater page. Download and extract the installer then run it. Follow the instructions, restarting if needed. Your OSCR should show up then.
Currently, the Firmware Updater cannot be used to flash a new Arduino for the first time or to update very old OSCR firmware versions. Use the manual method described below for that.
Using the Arduino IDE
The Cart Reader's firmware is released as source code and needs to be compiled before flashing. This method allows you to easily modify the firmware and hopefully sparks your interest in contributing to this project. 🔧🔨😊
Both compiling and flashing can be done with the Arduino IDE. You can either use the Portable Release or the official Arduino IDE installer.
Portable Release with oscr_tool (Windows 10/11):
- Download the latest V#.#_Portable.zip or .7z from the Releases tab and extract it.
- Put the OSCR's SD card into your PC
- Connect the OSCR to your PC, set the voltage switch to 5V and switch the OSCR on
- Double click on launch_oscr_tool.bat and wait for the GUI to open
- In OSCR tool make sure the correct COM port is selected
- Click Backup button to make a copy of your current OSCR firmware
- In the Hardware Config table select your HW version e.g. HW5 and if needed adjust the other options according to your OSCR's hardware configuration
- Enable/disable all needed options and/or modules (if you enable more than one additional console you probably have to disable one of the default console modules)
- Press Apply Changes button
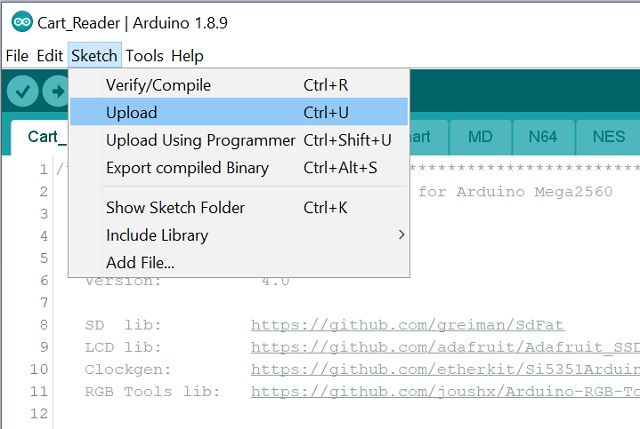
- In Arduino IDE click Sketch -> Upload and wait for it to complete
- Back in OSCR tool click Copy to SD button to update the databases on the SD card
Portable Release (all Windows):
To upload the firmware to the Cart Reader please follow these steps:
0) Plug your Open Source Cartridge Reader into a USB port of your PC. The 3V/5V switch needs to be set to 5V and the ON/OFF switch needs to be set to ON.
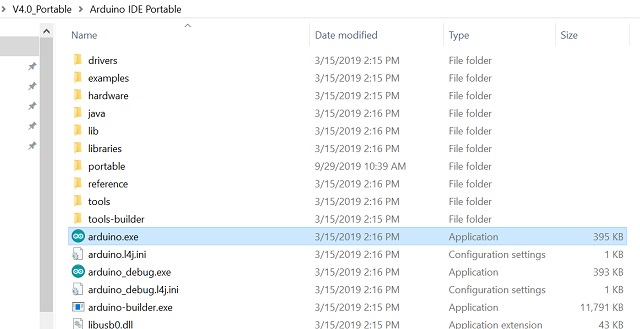
1) Download the latest V#.#_Portable.zip or .7z from the Releases tab and extract it.
2) Install CH341 drivers if needed by running SETUP.exe in the "CH341 Drivers" folder.
After the successful installation of the driver, there should be a CH340 entry in the device manager(WIN+R devmgmt.msc). This will also tell you what COM Port you need to select later on.

3) Launch "arduino.exe" found in the "Arduino IDE Portable" folder you just extracted(right-click "Run as administrator" might be necessary).
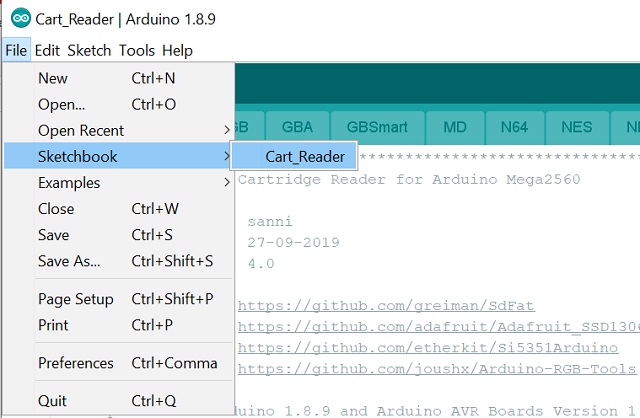
4) In the Arduino IDE go File -> Sketchbook -> Cart_Reader
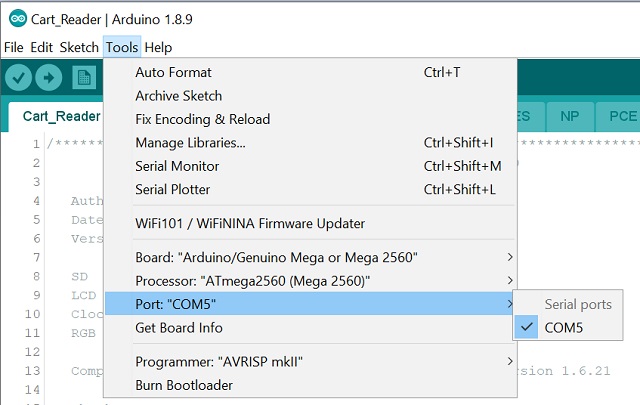
5) Then Tools -> Board and set it to "Arduino Mega or Mega 2560".

6) Now Tools -> Port and select the COM port your Arduino is using.
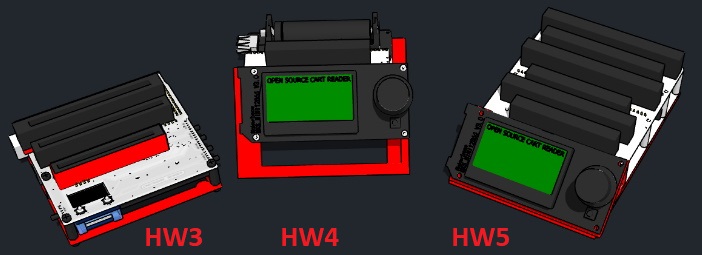
7) Next you need to go to the config.h tab and define your hardware version by removing the // in front of your version.
You can tell which hardware version you got by comparing your OSCR with this image:
You can also remove // before #define ENABLE_XXX to enable add-on modules you need.
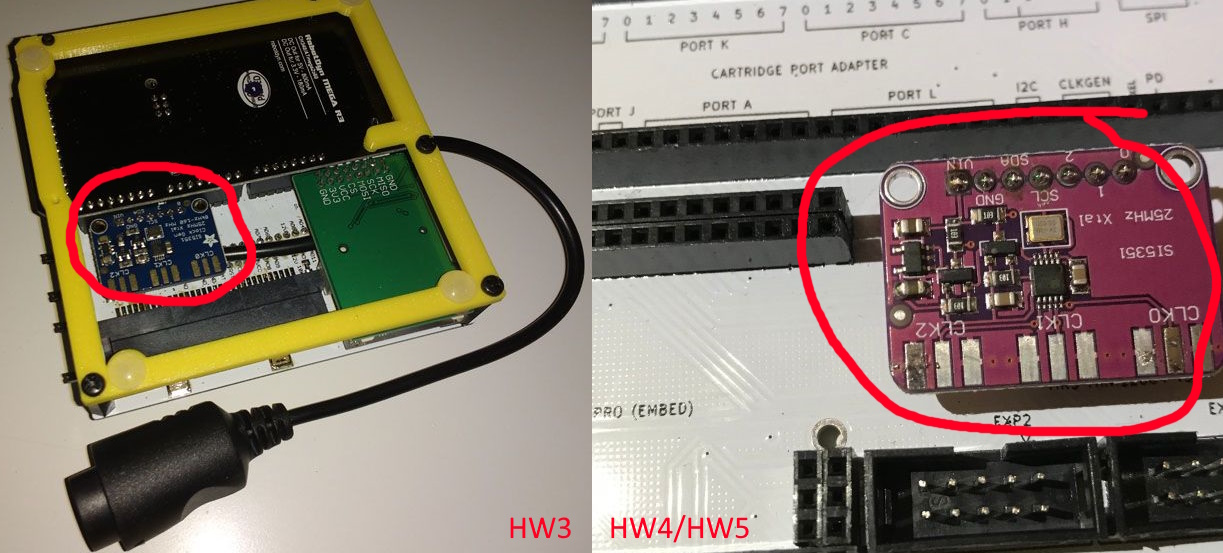
8) In case you do not have the Clock Generator installed you need to change the line "#define clockgen_installed" to "//#define clockgen_installed".
You can tell if you have the clock generator installed by comparing your OSCR with this image:
9) Finally Sketch -> Upload
10) Also don't forget to update the SD database files like described here
Official Arduino IDE Installer:
Alternatively you can download and install the Arduino IDE and then copy the "libraries" and "Cart_Reader" folder from the current release "VX.X_Portable\Arduino IDE\portable\sketchbook" to "C:\Users\your_username\Documents\Arduino" and launch the Arduino IDE from the start menu.
It should look like this when done:
C:\Users\your_username\Documents\Arduino\Cart_Reader
C:\Users\your_username\Documents\Arduino\libraries
If you want to use the latest fixes and features you can download and extract the current master branch and copy the Cart_Reader folder to:
C:\Users\your_username\Documents\Arduino\
In both cases don't forget to also copy the files in the SD directory to your SD card like described here.