This guide covers the assembly of the Cart Reader (SNES and N64 version). You should know how to solder SMD before attempting to build this, especially the microUSB port can be tricky.

First solder the SMD parts. There are three 220 ohm resistors for the three colors of the RGB led, two 10K resistors for the buttons and a single 1K resistor for reading the N64 eeprom.
Pay attention to the 22uF capacitor's polarity, the positive side on the PCB is marked with a + and on the capacitor the positive side is marked with a white line. Also remember that you need to flash the snesCIC code to the PIC micro before soldering it to the PCB.
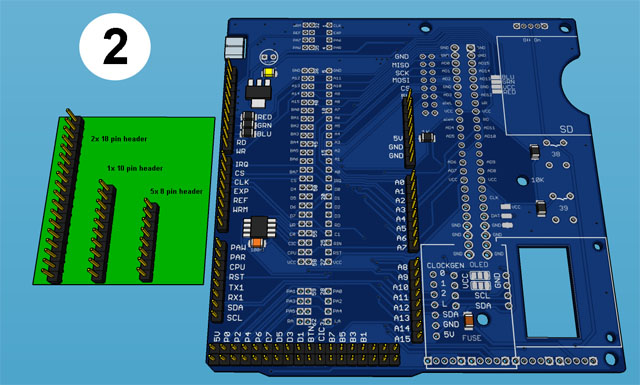
Next are the male pin headers.
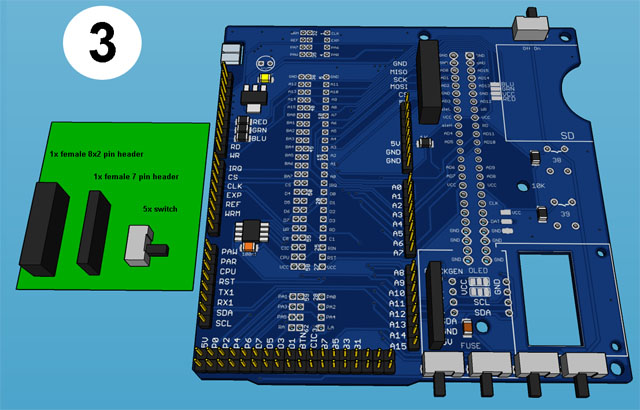
Then the female pinheaders and the switches.
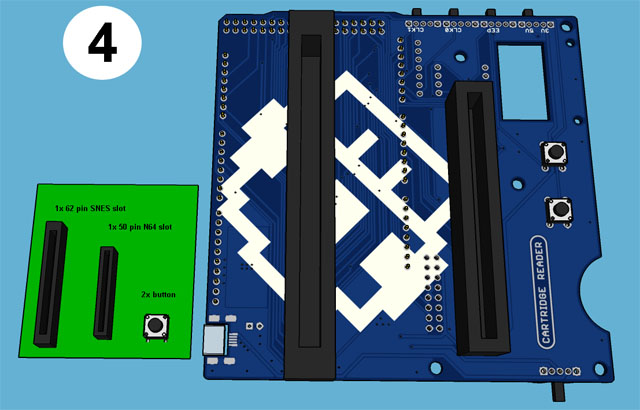
Now install the two cart slots and buttons, for the SNES slot you can use the 3d printed snes_spacer to give the slot a better stability.
Remember to trim the legs of the slots after you soldered them in place so that the metal doesn't short anything once plugged into the Arduino.
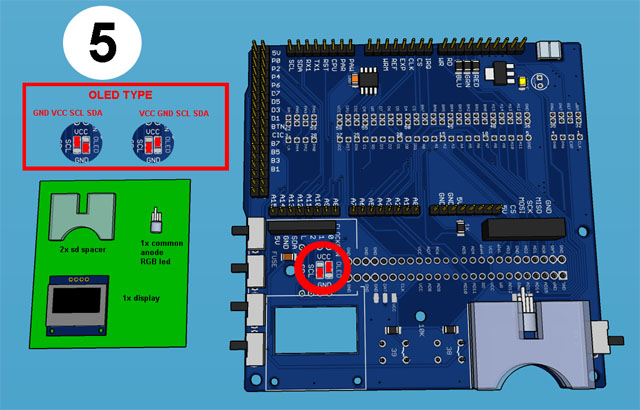
Use sticky tape to install the SD card spacer then shorten the LED's legs and solder it in place. Check what kind of OLED screen you have. There are variants with different pinouts. One starts with VCC followed by GND and the other one starts with GND and then comes VCC. Short the jumpers on the back accordingly, but pay attention since on the backside left and right are flipped.
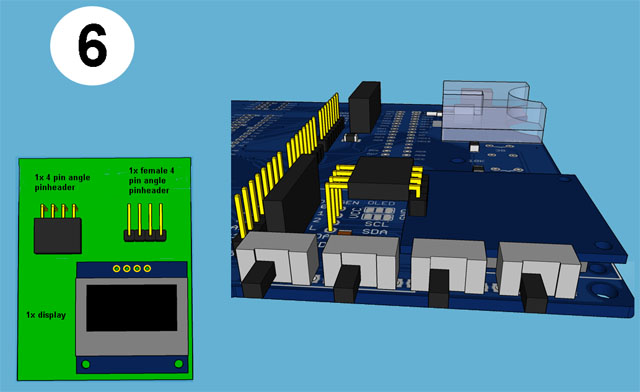
Solder down the OLED screen using the angled male and straight female pin headers. You have to bend the female pin header into the right position.
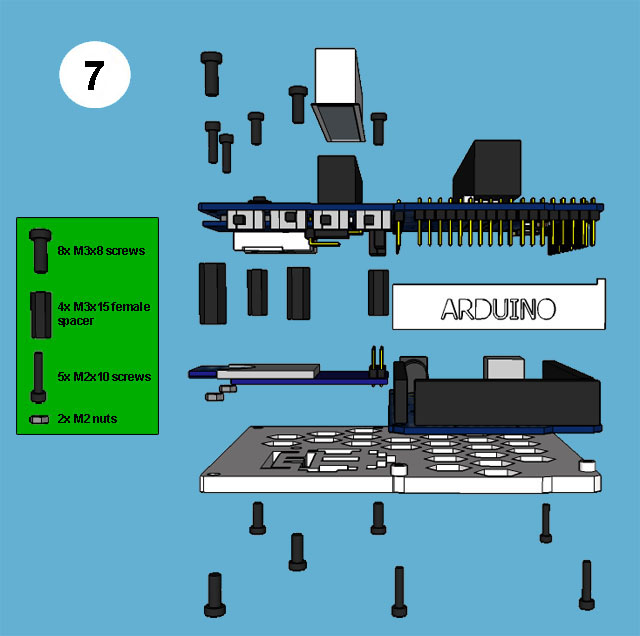
Finally plug the Arduino Mega and the SD module into the cart reader shield. Use eight M3x8 screws and four 15mm female standoffs to fasten the backplate to the cart reader shield.
Then use two M2x10 screws and two M2 nuts to secure the OLED display.
Lastly slide the sidewall into the space between the Arduino Mega and the cart reader shield and use the remaining three M2x10 screws to tighten the backplate through the Arduino Mega against the sidewall.