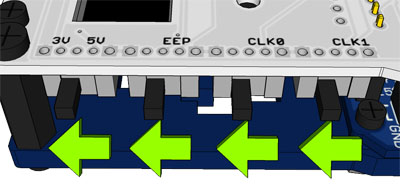
Setup the Cart Readers configuration switches like so:
For the repro to be flashable with the OSCR it needs to have a PCB with an Altera Max II CPLD and Spansion S29GL256N or MX29LV640 flashroms.
The repro cart needs to have the same CIC and save type as the ROM you want to flash and the ROM needs to be in Z64 file format. Here is a list of all the games and their save and cic type.
Changing the repro to PAL:
The repro needs to be the same region as your console or else it won't boot.
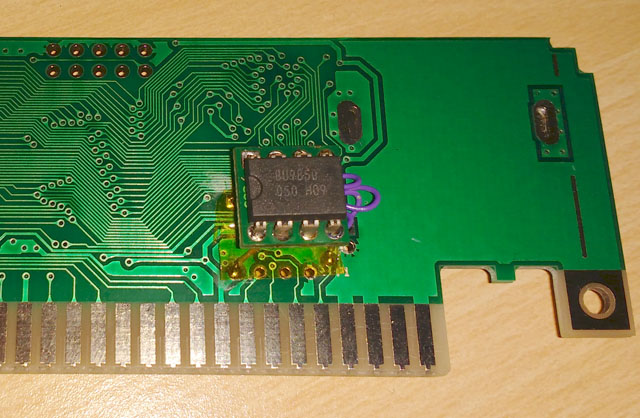
On the PCB there is a solder jumper marked with J1. If you bridge the middle(PIN3) and the lower(GND) pad together then the ultraCIC will be switched to PAL. But make absolutely sure that PIN3 is not connected to VCC(red in the picture) by default, if that's the case you need to cut its connection to VCC before you connect it to GND. Check with a multimeter after everything is done and make sure that VCC and GND are not shorted.
Some newer repro cartridges lack the solder jumper found in older models. The most straightforward solution to address this issue is to reflash the ultraCIC chip with the UltraCIC III firmware, which can be found here: UltraCIC III on GitHub. This updated firmware automatically switches the region if the cartridge fails to boot, making it a convenient and reliable option.
Reflashing the ultraCIC:
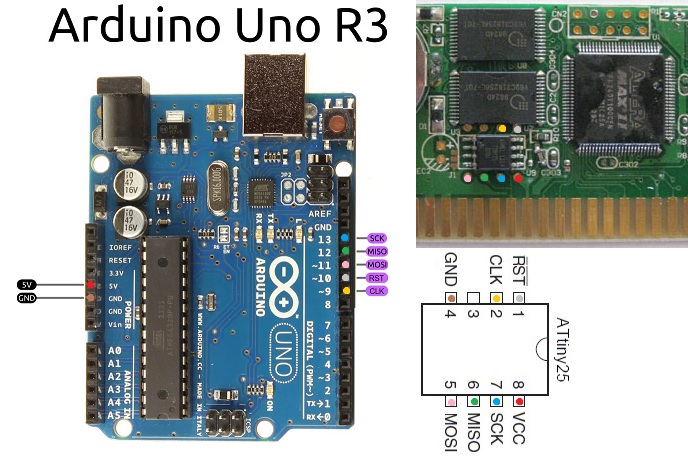
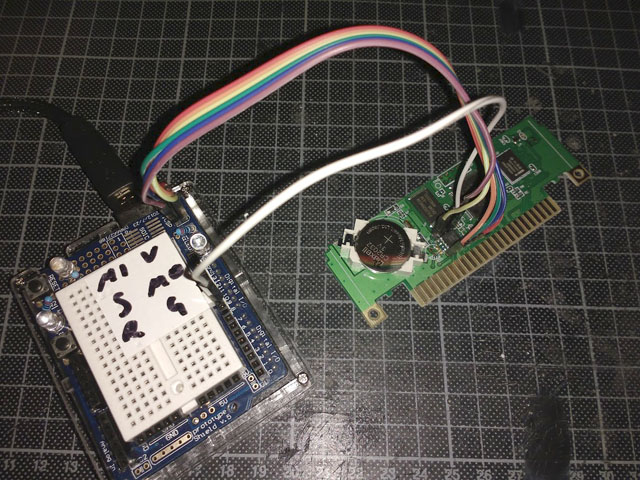
You can also re-flash the Attiny25 to a different CIC type using an Arduino Uno running this sketch by Adafruit.
Don't forget to connect Pin 9 of the Arduino Uno to Pin 2 of the ultraCIC to provide a clock signal.
Furthermore, many Arduino boards (e.g., UNO, Mega) require a 10µF electrolytic capacitor between RESET and GND, with the positive (long leg) connected to RESET. The capacitor prevents the "master" Arduino from resetting when the serial port is opened. If the board resets, programming will fail.
First read out the Attiny25's current code in binary form. Since you most likely already have the Arduino IDE installed we will use the included avrdude for that.
Just create a *.bat file with this content, you have to change COM6 to whatever COM port your Arduino got assigned:
"C:\Program Files (x86)\Arduino\hardware\tools\avr\bin\avrdude.exe" -C "C:\Program Files (x86)\Arduino\hardware\tools\avr\etc\avrdude.conf" -c arduino -P COM6 -b 19200 -p t25 -U flash:r:ultracic_read.bin:r
pause
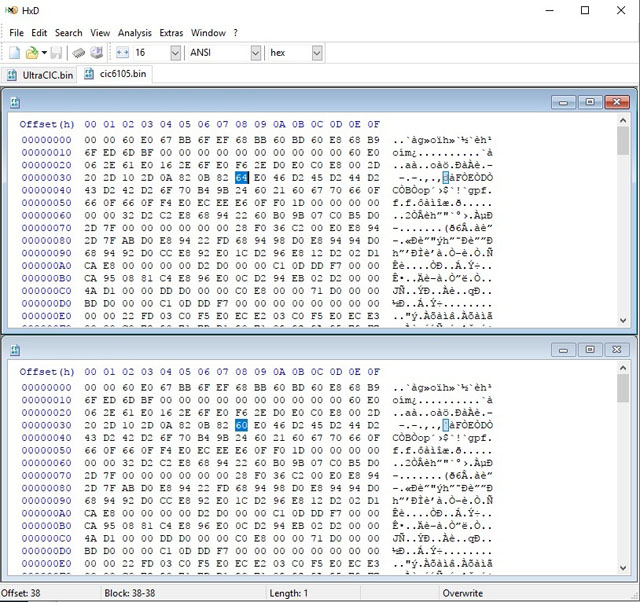
To change the CIC type just edit the value at Offset 0x38 with an hexeditor:
0x60 = 6102
0x61 = 6103
0x62 = 6106
0x63 = 6101
0x64 = 6105
0x68 = 7101
0x69 = 7103
0x6A = 7106
0x6B = 7102
0x6C = 7105
As an alternative you can also compile the switchable ultraCIC II from its source code
Next create a second *.bat file with this content to perform the flashing, once again you have to adjust COM6 to whatever COM port your Arduino got assigned and also change the filename according to your hex file:
"C:\Program Files (x86)\Arduino\hardware\tools\avr\bin\avrdude.exe" -C "C:\Program Files (x86)\Arduino\hardware\tools\avr\etc\avrdude.conf" -c arduino -P COM6 -b 19200 -p t25 -U flash:w:ultracic.bin
pause
Changing the CIC Type of a ROM
For certain games, the simplest way to ensure compatibility is to modify the CIC type of the ROM file to match the CIC type of the cartridge. However, it is important to note that not all games will function correctly with this method. For reference, you can check the compatibility of PAL games here, which in most cases is similar to NTSC compatibility. Steps to Change the CIC Type
Begin by downloading the Open-MOTET utility from its GitHub repository: Open-MOTET on GitHub. Once downloaded, compile the program following the instructions provided in the repository.
After compiling Open-MOTET, you can use it to modify the CIC type of a ROM file with the following command:
./cic input_game.z64 output_game_name [cic-type: e.g., 6102]
Replace input_game.z64 with the path to your source ROM, output_game_name with the desired name of the modified ROM, and specify the target CIC type (e.g., 6102).
Adding an eeprom chip:
If your repro only has a SRAM save chip you can salvage an eeprom chip out of a real N64 game and solder it into your repro like that: